Popular Ear Piercing Ideas & Combinations for a Curated Look
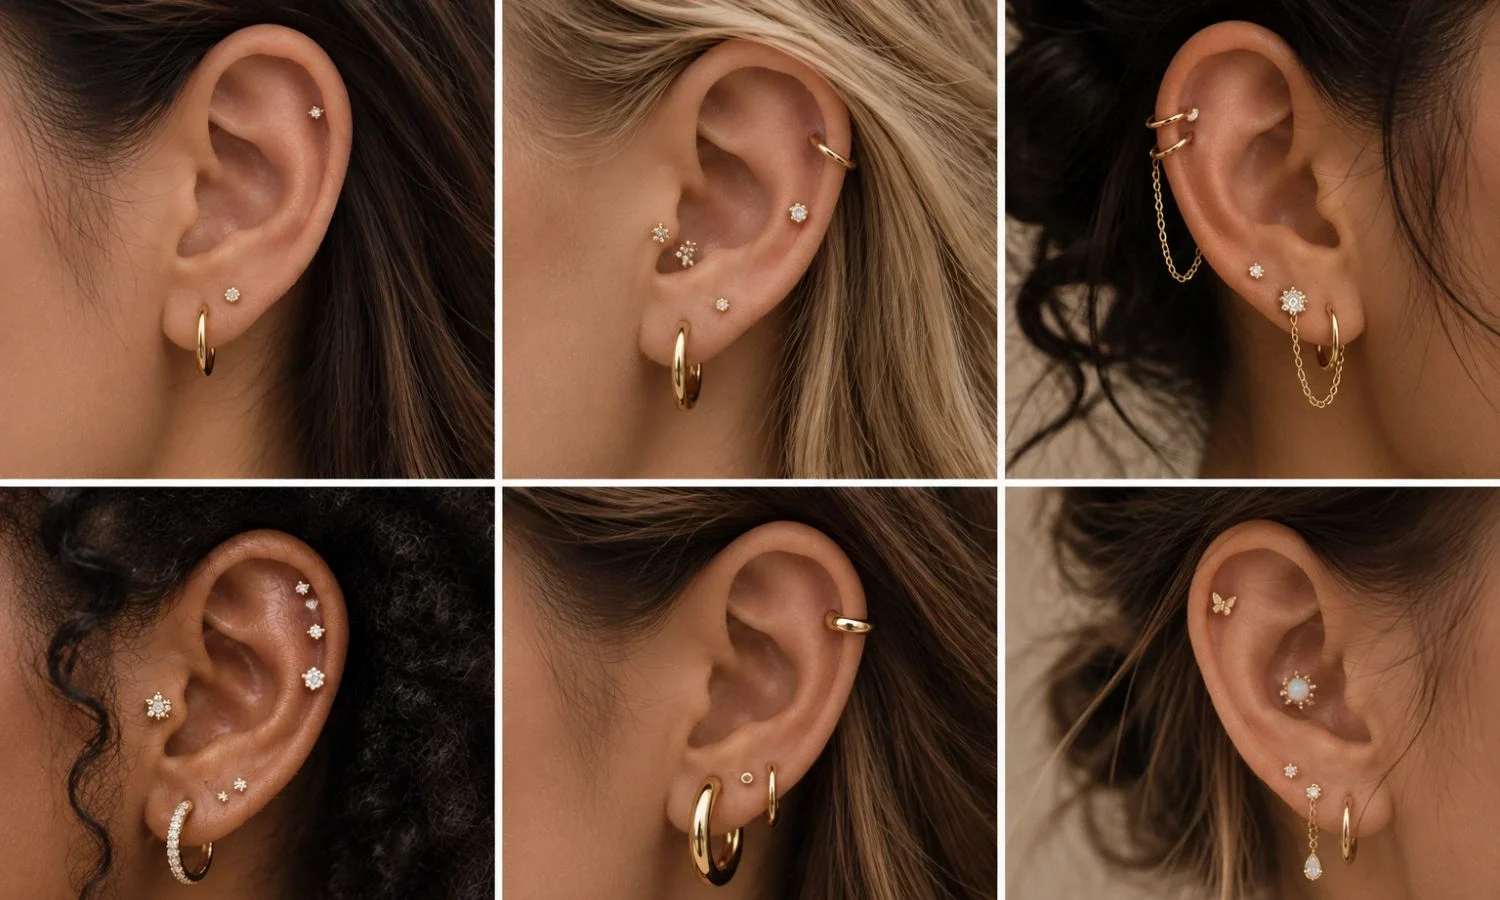
You can have one piercing or ten and still feel like something is “off.” The difference is curation: placement, spacing, jewelry size, and a plan that fits your anatomy.
In this guide, we’ll break down popular ear piercing ideas & combinations (plus how to choose the right one for your ear and your lifestyle). If you’re in San Antonio, TX, you’ll also see what a professional consultation looks like at Southern Tattoo Society—so your look isn’t just trendy, it’s safe, clean, and built to heal well. For more local guidance, see our San Antonio ear piercing guide.
Looking for practical ear piercing ideas that don’t feel random? Start here.
Quick Take (What Makes a Curated Ear Actually Look Curated)
A curated ear looks planned—even if you build it over time. The goal isn’t “more piercings.” The goal is a layout that reads clean from every angle and feels like it belongs on your ear.
One focal point (like a conch or statement lobe) + supporting accents (tiny studs/hoops).
Consistent metal tone (or intentional mixing) and a clear vibe: minimal, bold, soft, or edgy.
Balanced spacing and anatomy-first placement (not every trend fits every ear).
Quality jewelry + sterile technique so the whole design heals clean and looks sharp long-term.
Common mistake: stacking too many “medium” pieces. A curated look usually needs a clear size hierarchy (one hero, a few supporting pieces, and some negative space).
Table of Contents
How to Plan a Curated Ear (Local-Studio Approach)
Popular Ear Piercing Ideas (With Who They’re Best For)
Jewelry Rules That Instantly Look More “Curated”
Safety + Professionalism: What to Expect From a Real Studio
Aftercare + Healing Tips (So Your Stack Stays Clean)
Piercing Consultation Checklist (San Antonio)
Frequently Asked Questions
Book Your Ear Curation in San Antonio
How to Plan a Curated Ear (The Same Way a Pro Piercer Does)
A curated ear isn’t “pick a few piercings and hope it works.” It’s a design process—just like a custom tattoo. The best results come from planning your layout, your jewelry, and your healing timeline together.
If you’re building a curated ear piercing look, a studio consult matters because it lets a professional piercer map placements to your anatomy, your comfort, and your daily routine.
Step 1: Pick a Clear Style Direction
Before placements, decide the vibe. This single decision makes everything easier, especially when you start adding jewelry later.
Minimal & polished: tiny studs, micro-hoops, clean spacing, one metal tone.
Soft & sparkly: opals/pearls, small gems, clusters, delicate shapes.
Bold & graphic: thicker hoops, black accents, spikes, stronger geometry.
Modern mix: clean studs + one standout piece (conch/flat) for balance.
Tip: Save 3–5 inspiration photos that match your vibe. Don’t worry if the exact ear anatomy is different, your ear piercer can translate the style into placements that work for you.
Step 2: Let Anatomy Call the Shots
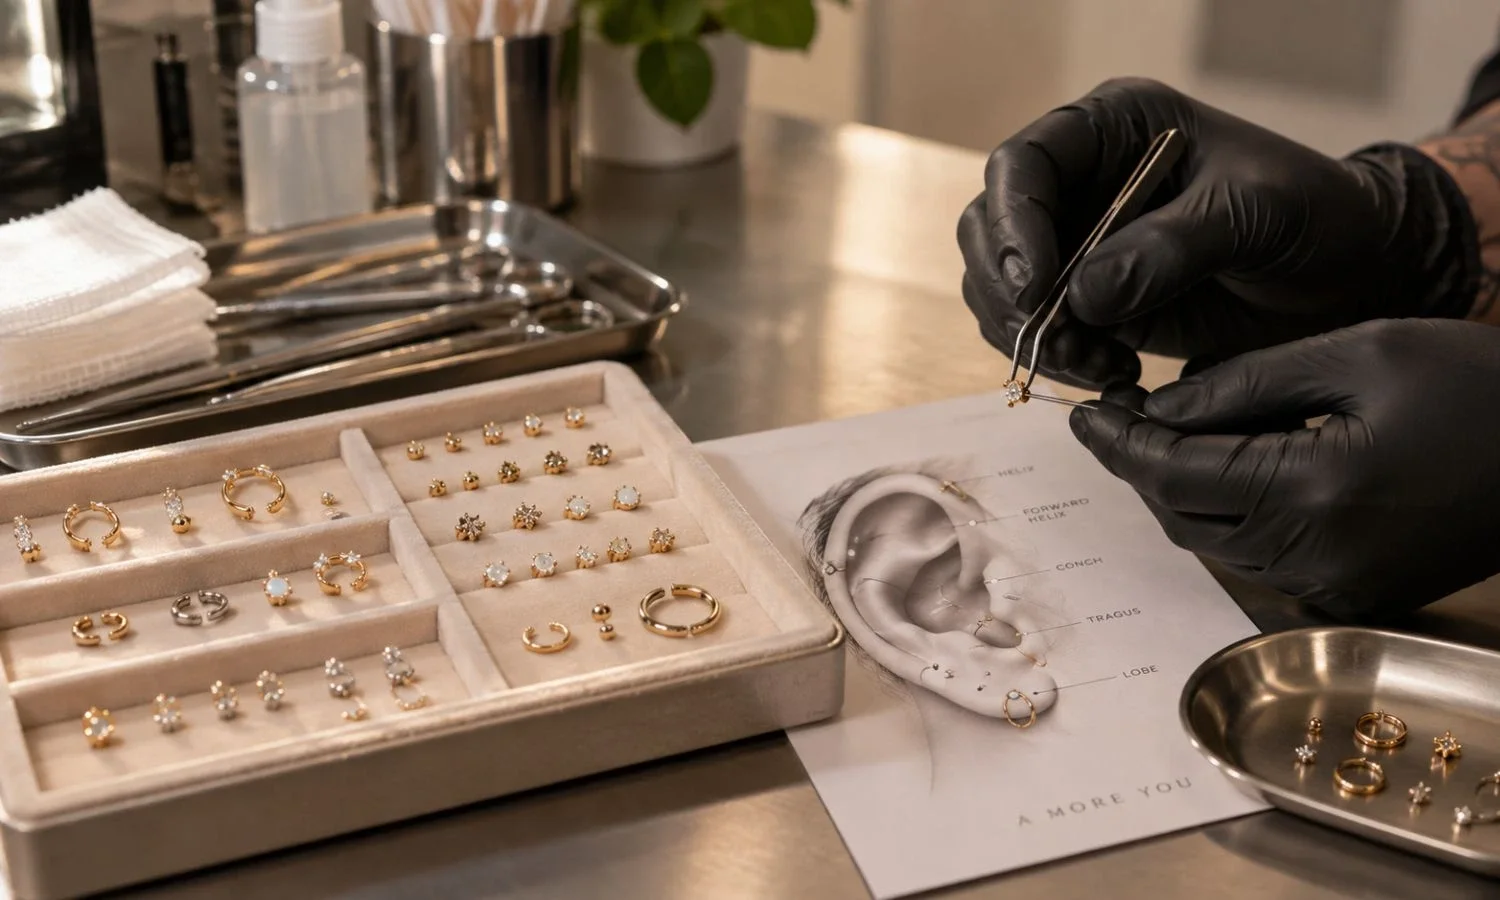
Some ears have the perfect ridge for a helix stack. Others are built for a conch centerpiece or a clean flat placement. Anatomy-first placement helps your jewelry sit flush, reduces irritation, and makes the whole layout look intentional.
During a consultation, a professional piercer will look at things like ridge thickness, fold shape, available “flat” space, and how your ear sits when you move—then recommend options that will heal and look right.
Step 3: Build a Foundation (Usually Lobes)
Lobes are the easiest place to create flow from “statement” to “tiny.” A first lobe can carry the most visual weight. Second and third lobes taper down in size, which naturally looks curated.
If you already have lobe piercings, a piercer can often improve the look by adding a stacked lobe (a slightly offset placement) or by planning jewelry sizes that create a smoother gradient.
Step 4: Add One Anchor Piercing (Your Focal Point)
If you want your ear to look intentionally designed, add one focal point in the middle or upper ear—often a conch or flat. This turns a simple lobe stack into a full composition.
How to choose your anchor: Conch feels centered and bold. Flat feels like a “showcase” for a decorative stud. Rook/daith feels more architectural and alternative (and more anatomy-dependent).
Step 5: Finish With Accents (Not Clutter)
Accents are the difference between “curated” and “crowded.” One or two small cartilage placements (like a helix or forward helix) can frame the whole look without overdoing it.
Staging helps: Many people get foundation + one anchor first, heal, then come back for accents. This keeps healing manageable and gives you time to see what the ear actually needs.
Popular Ear Piercing Combinations (With Who They’re Best For)
Below are popular combinations we see clients ask for when they want a curated look. Use these as inspiration, then let a piercer adjust the plan based on your ear anatomy and your daily routine (earbuds, side-sleeping, helmets, work dress codes, etc.).
Quick note on planning: If you want multiple new piercings, talk about a realistic timeline. Healing is part of the design.
1. The “Starter Curated” Combo: 2nd Lobe + Helix
This is the cleanest entry point into a curated ear. The second lobe adds balance, and the helix adds height. Together, they create a “frame” without committing to a heavy cartilage layout.
Best for: first-timers who want a clean upgrade.
Look: classic base + a subtle frame on the rim.
Jewelry idea: small hoop in 1st lobe, tiny stud in 2nd lobe, micro-stud in helix.
2. The Clean Gradient: Triple Lobe Line
Three lobes in a smooth line is one of the easiest ways to look “styled” every day. It’s also easy to dress up or down depending on jewelry.
Best for: everyday wear, easy styling.
Look: large-to-small progression that always reads intentional.
Jewelry idea: hoop or statement stud → smaller gem → micro-stud.
3. The Constellation: Stacked Lobe + Forward Helix
If you like delicate sparkle, this combo gives you a clustered “constellation” look without needing a lot of piercings. The forward helix also helps frame the ear from the front.
Best for: soft, detailed sparkle without feeling heavy.
Look: clustered points of light that feel custom.
Jewelry idea: tiny gems (same color family) with flat-back studs for comfort.
4. The “Designer” Look: Conch + Double Helix + 2nd Lobe
This is one of the most balanced curated layouts: a strong center anchor (conch), rim framing (double helix), and a clean base (2nd lobe). It reads curated from every angle.
Best for: clients who want a clear focal point.
Look: center anchor + rim framing + base support.
Jewelry idea: conch stud (or future hoop after healing) + two small helix accents.
5. The Statement Top: Flat Piercing + Lobe Stack
Want one piece that looks high-end and intentional? The flat is a great “display” zone. Pair it with simple lobes and you get a clean, curated layout that’s easy to maintain.
Best for: anyone who wants one hero piece.
Look: bold upper-ear focal point that still feels clean.
Jewelry idea: decorative flat piece + simple lobes so the top stands out.
6. The Architectural Combo: Rook + Conch + 2–3 Lobes
This combo adds depth through the inner ear and looks more “structured” than a simple helix stack. It’s a strong choice for experienced clients who want something less common.
Best for: experienced clients who like a more structured look.
Look: depth through the inner ear + an anchor + a classic base.
Note: anatomy matters a lot here—get assessed first.
7. The Balanced “Mid-Ear” Combo: Tragus + Helix + Double Lobe
This layout spreads the design across the ear: front (tragus), top (helix), and base (lobes). It’s a great way to look curated without stacking a lot of cartilage.
Best for: a curated look that feels noticeable but not busy.
Look: front detail + rim height + clean base.
Lifestyle note: if you live in earbuds, ask your piercer what’s realistic for you.
8. The Bold Ring Moment: Conch Hoop (After Healing) + Minimal Lobes
Not everyone wants a “stack.” If you want one strong line, a conch hoop (once appropriate for your healed piercing) can do more than three extra piercings.
Best for: one strong visual line without stacking a lot.
Look: elegant, confident, and instantly curated.
Jewelry idea: simple studs in lobes so the conch ring gets the attention.
9. The Alternative Frame: Industrial (If Anatomy Allows) + Lobe Stack
This is a bold, graphic look that doesn’t need a lot of extra jewelry. If your anatomy supports an industrial, it creates a strong top line that instantly reads “intentional.”
Best for: clients who want edge and a clear statement.
Look: strong top line + clean base support.
Note: industrials are anatomy-dependent and require a realistic healing plan.
10. The Intentional Asymmetry: “Statement Ear” + “Support Ear”
Matching ears can look great. But planned asymmetry often looks more modern and personal. One ear becomes the main design; the other keeps things clean and wearable.
Best for: modern styling and people who already have mismatched piercings.
Look: one ear carries the design; the other echoes the theme.
Rule: repeat at least one element (metal tone, gem color, or shape) on both ears.
If you’re collecting more ear piercing ideas, bring your favorites into a consultation. A pro can tell you what fits your ear, what fits your lifestyle, and what order to do it in.
Jewelry Rules That Instantly Look More Curated
Placement builds the blueprint. Jewelry gives it personality. If you want your stack to look intentional in photos and in real life, these rules help fast.
Choose one hero piece. One focal point. Everything else supports it.
Control scale. Bigger pieces lower on the ear, smaller pieces higher up.
Repeat a detail. Same metal tone, gem color, or shape ties the look together.
Use negative space. Open space is what makes each piece readable.
Plan for healing jewelry first. Initial jewelry may be simpler and sized for safe swelling and healing.
Pick Materials That Support Healing
Quality matters. Your piercer should recommend body-safe materials and properly sized jewelry for the placement. Learn more about choosing the best metal for piercings before selecting jewelry for a fresh piercing. This is one of the biggest differences between a professional studio experience and a rushed piercing.
Studs vs. Hoops (When Each One Looks Best)
Studs tend to look clean and minimal—especially for a fresh curated layout. Hoops add movement and can become a statement, especially in lobes, helix, and conch (once appropriate for your healing stage).
Mixing Metals Without Looking Messy
If you want mixed metals, do it intentionally: choose a dominant tone (like yellow gold), then use the second tone as an accent in one or two pieces. Random mixing is what makes a stack look unplanned.
Safety + Professionalism: What to Expect From a Real Studio
A curated ear only looks good if it heals well. That comes down to sterile technique, quality jewelry, and a piercer who’s honest about what will (and won’t) work for your ear.
At Southern Tattoo Society in San Antonio, the process is built around clean standards and a consult-first approach—because body art should be intentional. You can also explore our piercing services to see what’s available. Founder A.ONE brings 23+ years of experience in the industry, and the studio is known for professional work and clean, sterile practices.
Professional Piercing Should Never Feel Rushed
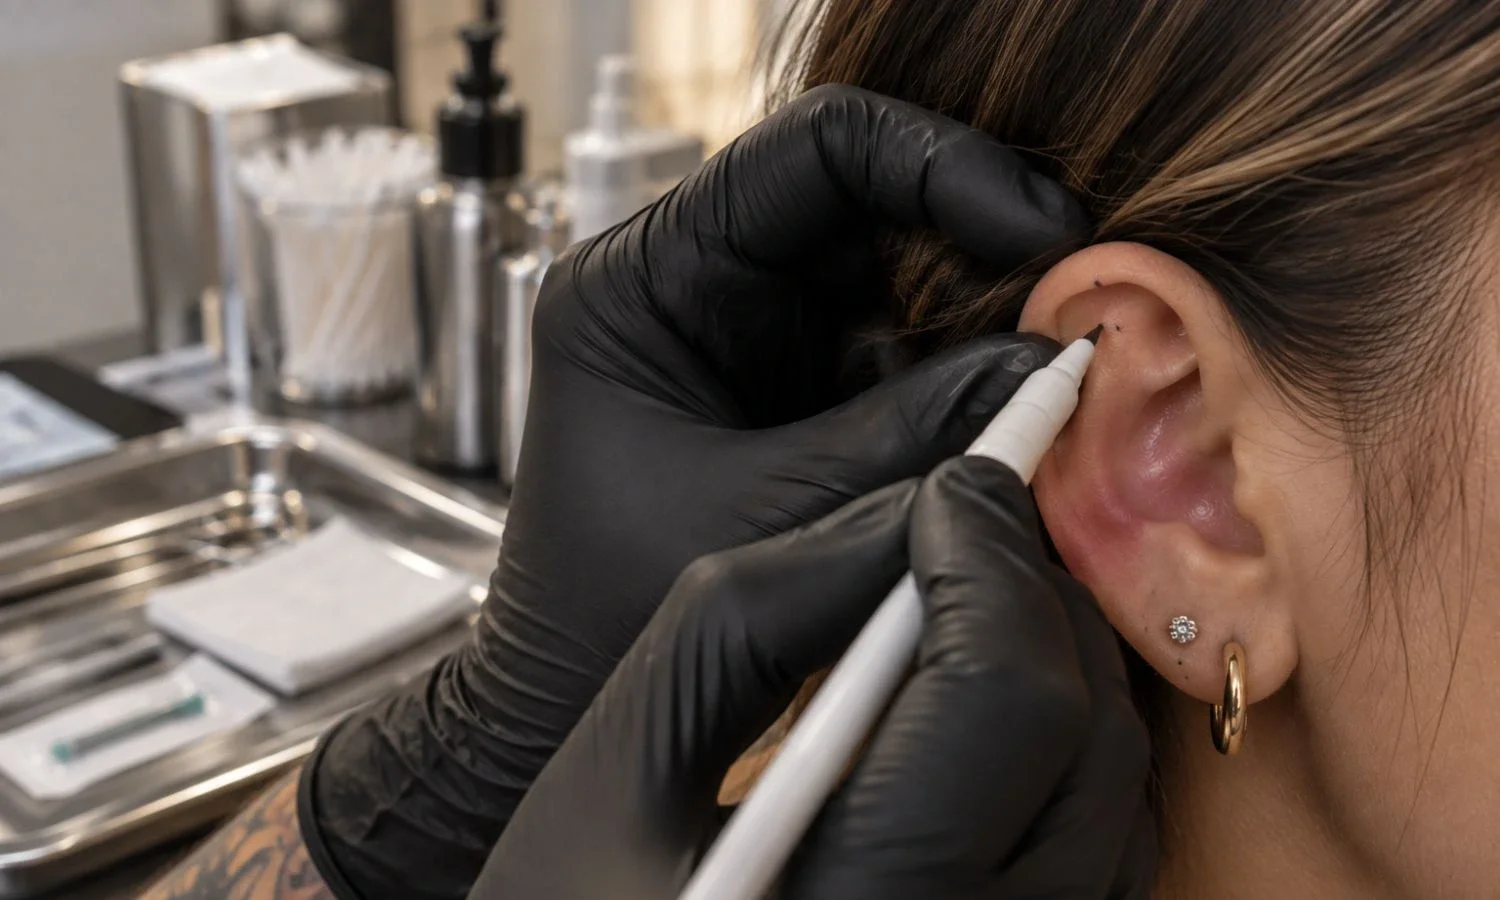
A real appointment includes mapping and marking. You should be able to look in the mirror, check angles, and approve placement before anything happens. This is where curation becomes real—because a few millimeters can change the entire look.
What “Sterile” Should Look Like
Single-use needles (not piercing guns).
Sterile tools and clean work surfaces.
Gloves and proper setup to keep everything controlled and clean.
Appropriate jewelry materials and sizing for fresh piercings.
Clear aftercare instructions you can realistically follow.
If you ever feel pressured into a placement you’re unsure about, pause. A good piercer would rather redesign the plan than force a trend that doesn’t fit your ear.
Aftercare + Healing Tips (So Your Stack Stays Clean)
Aftercare is what protects the design. The goal is simple: keep it clean, keep it calm, and don’t rush jewelry changes.
Your Simple Aftercare Routine
Wash your hands before touching your piercings.
Clean only the way your piercer recommends.
Don’t twist or rotate jewelry.
Avoid sleeping directly on fresh piercings (a travel pillow can help).
Keep hair products, makeup, and skincare away from healing piercings when possible.
What to Avoid While Healing
Changing jewelry early “just to see how it looks.”
Over-cleaning (more isn’t better).
Snag risks: towels, hairbrushes, tight headphones, helmets, collars.
Ignoring irritation. If something feels off, check in early.
Be Patient With Cartilage
Cartilage piercings typically take longer than lobes. That’s normal. If your goal is a fully curated ear, your healing timeline is part of your plan.
Piercing Consultation Checklist (San Antonio)
If you want your curated ear to look custom (not copied), show up with a plan and let a pro refine it. A strong consult should leave you with clarity: what you’re getting, why it fits your ear, what jewelry you’re starting with, and what the next steps look like.
What to Bring
2–5 inspiration photos (vibe matters more than identical placement).
Your must-haves and hard no’s (minimal, bold, asymmetrical, etc.).
Notes about your lifestyle (earbuds, side sleeping, sports/helmets).
Your jewelry preferences (yellow gold vs. silver tone vs. mixed metals).
Any past healing issues or sensitivity concerns.
Questions Worth Asking Your Piercer
Which placement will be the focal point, and why?
What’s the smartest order to do these piercings in?
What jewelry style should I start with for healing?
When can I safely swap to different jewelry (like hoops)?
What are the biggest snag/irritation risks for my layout?
This is also where the best ear piercing ideas become a safe, wearable plan—built around your anatomy.
Frequently Asked Questions
For additional answers about appointments, piercings, jewelry, and studio policies, visit our piercing FAQs.
How Many Ear Piercings Can I Get at Once?
It depends on your placements, your healing history, and what your piercer recommends. More piercings at once can mean more swelling and a longer, more demanding aftercare period.
Do Cartilage Piercings Hurt More Than Lobes?
Cartilage usually feels sharper and can stay tender longer than lobes. Good technique, proper jewelry, and aftercare make a big difference.
Can I Build a Curated Ear Without Matching Both Ears?
Yes. Asymmetry often looks more modern—just repeat a unifying element like metal tone, gem color, or shape.
I Wear Earbuds Every Day. What Should I Consider?
Tell your piercer up front. Some placements are more compatible with earbuds than others, and your plan may need to be staged so healing is realistic.
When Can I Change My Jewelry?
Only when your piercer clears you to do so. Switching too early is one of the fastest ways to irritate a piercing and slow healing.
Book Your Ear Curation in San Antonio
Ready to turn inspiration into a clean, curated plan? Southern Tattoo Society is a locally owned tattoo and piercing studio in San Antonio, TX, located at 7327 N Loop 1604 W #101A, San Antonio, TX 78249. We’ll help you choose placements that fit your ear, your style, and your lifestyle—then back it up with professional standards and clear aftercare.
Book a consultation through southerntattoosociety.com and let’s build an ear stack that looks intentional, feels comfortable, and holds up over time.