
How Long Does a Tattoo Take to Heal? Understanding the Healing Stages and Duration
You’ve left the studio with a piece of art you love, but right now, your skin likely feels tight and radiates heat like a bad sunburn.
That sensation is your body’s natural response to what is essentially a "controlled medical scrape." While the stinging might feel alarming, it is the predictable kickoff to the tattoo healing process where your immune system begins locking the pigment in place.
Appearances during the next few weeks will be deceiving. Medical consensus distinguishes between two layers of recovery: the epidermis, your outer protective layer which seals quickly, and the dermis, the deeper tissue where the ink actually lives. Treating the surface is straightforward, but protecting that deeper layer requires respecting the full tattoo healing timeline.
Consider the "Iceberg Model" of recovery to manage your expectations. The two weeks of visible peeling represent only the tip of the process, while the structural repair hidden underneath constitutes the bulk of the work.
Although your skin may look finished after a month, the complete tattoo recovery time often extends up to six months as the dermis fully reorganizes around the ink.
Table of Contents
The First 72 Hours: Navigating the “Open Wound” and Inflammation Phase
Days 4 to 14: Managing the “Itchy Peel” Without Ruining Your Ink
The One-Month Mark: The “Ghosting” Phase and Skin Regeneration
Why Your Tattoo Isn’t “Done” at Six Weeks: The 6-Month Deep-Tissue Timeline
Normal Healing vs. Early Infection: 3 Red Flags You Can’t Ignore
Your Forever Ink Action Plan: Transitioning from Aftercare to Daily Skincare
Summary and Conclusion
The First 72 Hours: Navigating the 'Open Wound' and Inflammation Phase
Once the adrenaline fades, you are left with a bandage and a messy reality under the plastic. Your body treats this new ink exactly like a skinned knee, rushing fluids to the surface to flush out bacteria and seal the area. This is a completely normal biological reaction, though it can look alarming to first-timers expecting a pristine image immediately.
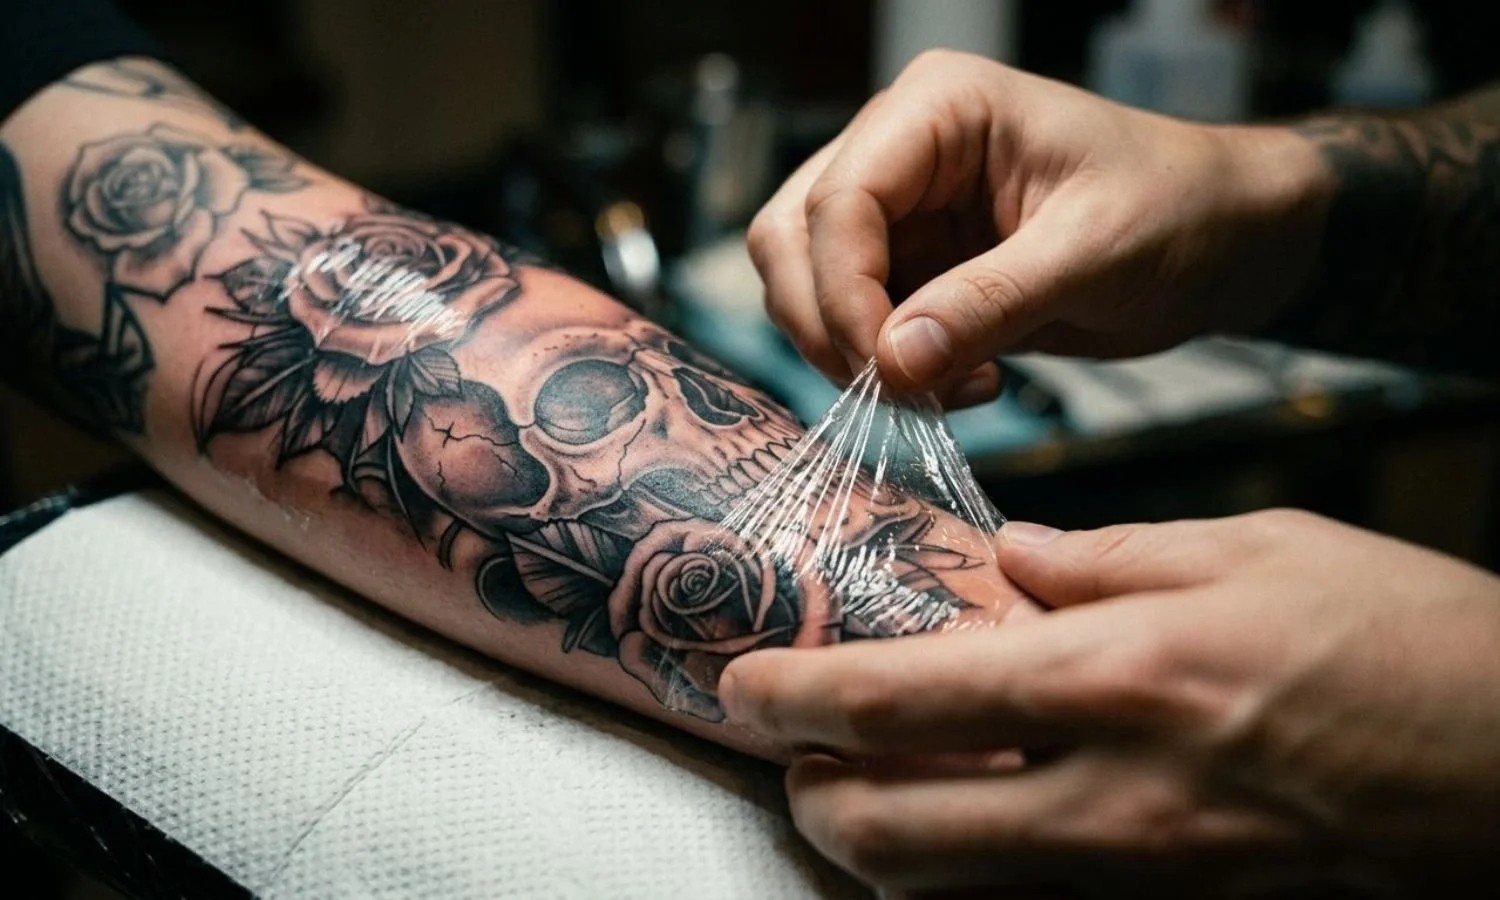
That slick liquid pooling beneath the wrap is plasma—a vital component of your blood that acts as a natural shield. If your artist used a medical-grade adhesive like Saniderm, this fluid creates a dark "ink sack" that keeps the wound moist and speeds up recovery. For those navigating Saniderm vs traditional bandage healing, the plastic wrap method is temporary; the fluid will likely leak, meaning you might wake up with an imprint of your tattoo on your sheets.
Should you find your skin stuck to clothing or bedding, never yank the fabric dry, as this can pull out settling ink. Instead, soak the area with lukewarm water until the material slides off freely. Once the bandage is removed, follow these tattoo aftercare instructions for beginners:
Wash your hands thoroughly before touching the area.
Gently lather with fragrance-free, antibacterial soap using only your fingertips.
Rinse with lukewarm water until the skin feels "squeaky" clean (no slime).
Pat dry with a clean paper towel—never a cloth towel, which harbors bacteria.
By the third day, the weeping will stop, and the skin will begin to tighten. As the inflammation subsides, you are about to enter the most testing phase of healing: the itch.
Days 4 to 14: Managing the 'Itchy Peel' Without Ruining Your Ink
Just when the initial tenderness subsides, your tattoo will likely begin to tighten and flake, behaving almost exactly like a recovering sunburn. This process signals that the epidermis—the outer layer of your skin—is shedding dead cells to allow a fresh, protective layer to regenerate over the ink. While it might look unsightly, seeing colored flakes of skin in the shower is a standard part of the cycle and does not mean your design is washing away.
Resisting the urge to pick at this shedding skin is critical for the longevity of your art. If you peel a flake prematurely, you risk pulling wet ink out of the deeper dermis layer before it has fully set, leading to permanent empty spots known as "fallout." Distinguishing between tattoo peeling vs scabbing is helpful here: thin, tissue-paper flakes are ideal, while thick, crusty scabs indicate the area was too dry or overworked and requires extra patience to fall off naturally.
Hydration is your primary defense against the maddening itch that accompanies this stage. To manage tattoo itching relief without scratching, apply a thin layer of the best fragrance-free lotion for new ink available to you (brands like Lubriderm or Cetaphil are common staples). If the sensation becomes unbearable, never use your fingernails; instead, gently slap the area with a flat palm to disrupt the itch signal without breaking the skin.
As you navigate these two weeks, use this checklist to ensure your healing is on the right track:
Healthy Peeling: Flakes are thin and carry the color of the ink; the skin underneath feels smooth but looks "milky" or opaque.
Problematic Scabbing: Scabs are thick, hard, or cracking; red halos appear around the edges of the artwork.
As the last flakes fall away, the intense itching will vanish, leaving behind skin that looks strangely dull—a phenomenon explored in the next phase.
The One-Month Mark: The 'Ghosting' Phase and Skin Regeneration
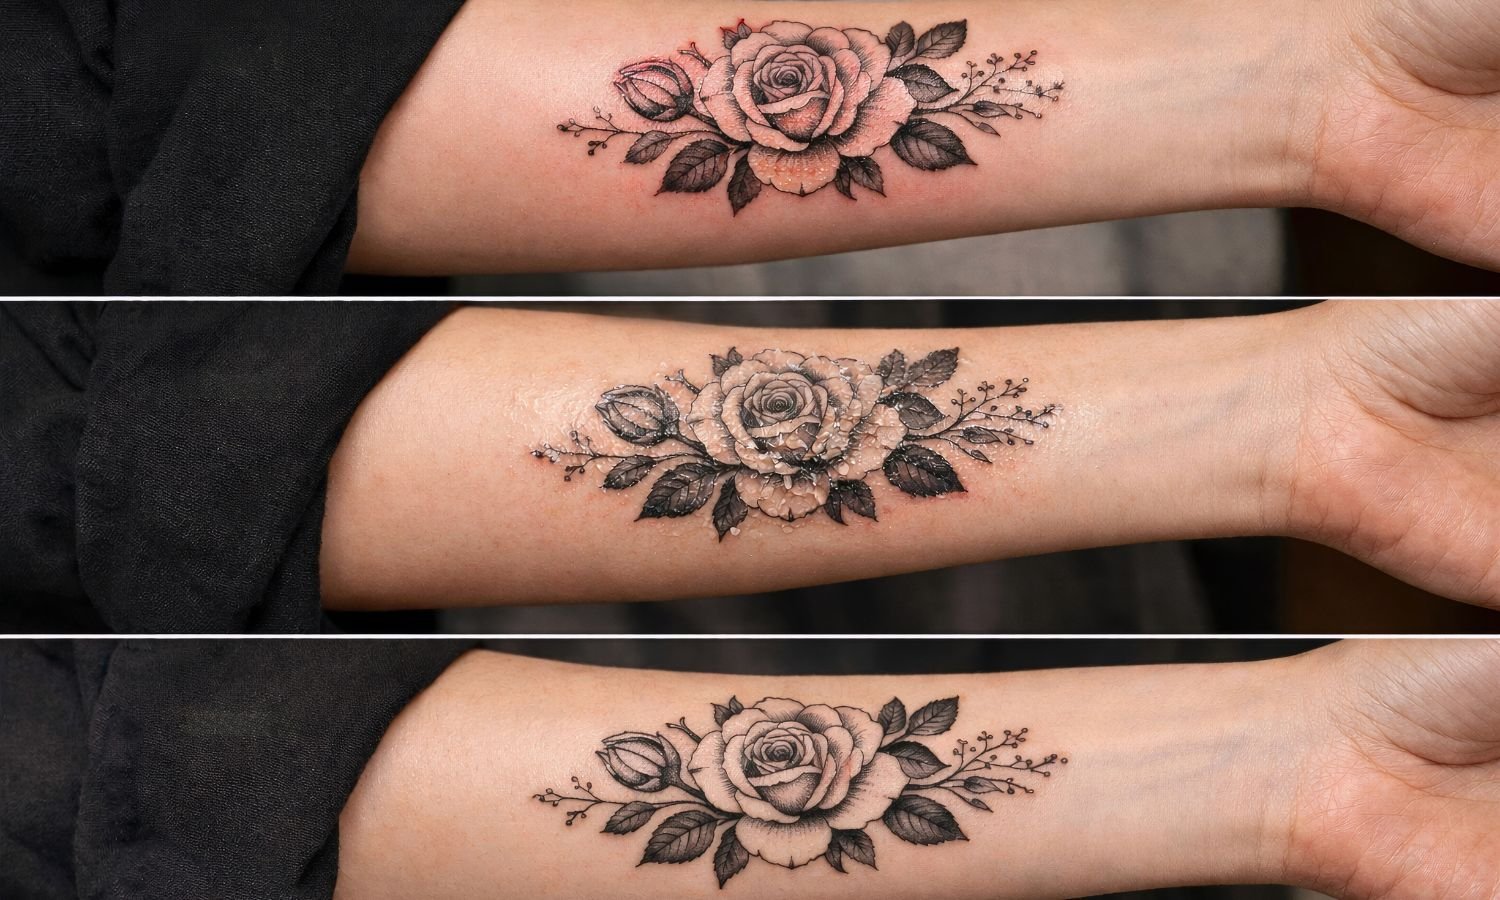
By the time you reach the third week, the heavy flakes are gone, yet your artwork might look disappointingly dull or hazy. This frequent cause of panic is often called "silver skin," a sign that a new, continuous layer of the epidermis has successfully closed the wound. While it may look like your expensive ink is washing out, the pigment remains safe in the deeper dermis layer; you are simply viewing it through a biological filter that hasn't cleared up yet.
Think of this fresh tissue like a sheet of semi-transparent tracing paper sitting on top of a bold drawing. The ink underneath hasn't faded, but it is being obscured by the natural opacity of these young, rapidly regenerating cells. This cloudy appearance is one of the most misunderstood tattoo healing stages, but rest assured that as the skin matures and exfoliates naturally over the next few weeks, this "window" will become transparent, allowing the original vibrancy of your colors and blacks to shine through again.
Since this regenerated surface is biologically similar to baby skin, it is hypersensitive and offers almost no natural defense against UV radiation. The impact of sun exposure on healing tattoos is most severe right now; a sunburn on this fresh tissue can warp the underlying ink and cause permanent blurring, making high-SPF sunscreen or clothing coverage non-negotiable. While the surface looks intact, accepting that the deeper layers are still hardening is vital—this hidden process continues long after the visual healing is complete.
Why Your Tattoo Isn’t 'Done' at Six Weeks: The 6-Month Deep-Tissue Timeline
Although the surface might look flawless after six weeks, your total tattoo recovery time extends far beyond what the eye can see. While the outer layer (epidermis) has sealed—usually making it safe to finally submerge in a bath or pool—the deeper dermis is still busy solidifying the ink. During this hidden phase, your body's immune cells wrap each pigment particle in a protective coating, locking the design in place for the long term.
Location plays a massive role in how long this settling process takes. Areas subject to constant motion or rubbing against clothing often experience micro-tears that prolong the healing window. Be prepared for extended timelines if you chose any of these high-movement zones, as they are notoriously significant factors that slow down tattoo recovery:
Elbows: Constant joint flexion stretches the fresh wound.
Knees: High tension creates slower regeneration.
Feet and Ankles: Shoe friction and gravity-related swelling delay closure.
Hands and Fingers: Frequent washing strips natural oils and irritates the site.
Waistline: Tight waistbands create constant abrasion.
Grasping the average recovery time by body placement prevents unnecessary worry when a knee tattoo heals slower than a forearm piece. Eventually, the ink will stop looking like a glossy sticker sitting on top of your arm and settle into the natural texture of your skin. However, if this timeline stalls or you notice increasing pain instead of gradual improvement, you need to stop waiting and start inspecting for signs of trouble.
Normal Healing vs. Early Infection: 3 Red Flags You Can't Ignore
Your fresh ink will naturally feel warm and tender for the first 48 hours, sensationally similar to a moderate sunburn. This heat implies your immune system is working correctly to repair the trauma. To manage this initial phase, reducing tattoo swelling and redness is usually simple: keep the area elevated and apply a cold compress (over a barrier cloth) for short intervals. However, if that manageable warmth turns into a throbbing pain that worsens after day three, your body might be fighting off bacteria rather than healing the skin.
Distinguishing between standard irritation and medical trouble requires looking for specific changes in the wound. While clear or slightly pink fluid (plasma) is normal when following a proper tattoo cleaning routine, thick or colored discharge is not. Watch closely for these signs of an infected tattoo that demand immediate medical attention:
Red Streaks: Thin red lines radiating outward from the tattoo, potentially indicating blood poisoning.
Fever: Body aches or chills suggesting a systemic issue beyond just the skin.
Green/Yellow Discharge: Pus is distinct from clear plasma and indicates active infection.
Foul Odor: A healthy tattoo smells like ointment or skin; a bad smell signals bacterial growth.
Sometimes, you might notice a blurry halo of ink spreading beneath the skin that looks like a permanent bruise. This is called a "blowout," caused by the needle depositing ink too deep into the fatty tissue. While visually frustrating, a blowout is a technical error, not a health risk, and requires no antibiotics. Once you have confirmed your skin is healthy and the scabs have finally cleared, you are ready to shift focus from safety to longevity.

Your Forever Ink Action Plan: Transitioning from Aftercare to Daily Skincare
Knowing exactly how long a tattoo takes to heal transforms your anxiety into patience. You have moved past the shock of the open wound stage and can now distinguish between surface peeling and the deeper settling that takes months. Instead of worrying about every flake, you can simply trust your body’s recovery timeline.
Your focus now shifts to recognizing when to stop applying ointment and transitioning to a lighter, fragrance-free lotion. Once the skin feels smooth to the touch, the heavy lifting is done. From here, integrating daily moisturizing and strict SPF use is the only way to prevent UV fading and keep your lines sharp.
The healing process is a lifelong commitment to skin health, not just a temporary checklist. When the ink no longer looks like a sticker sitting on top of your skin but feels like a natural part of you, you have succeeded. Treat your canvas with care, and your art will remain vibrant for decades.
For more guidance, visit our FAQs, book a tattoo consultation, or contact us.
Summary and Conclusion
Tattoo healing is best understood as a layered process with two timelines: the epidermis (surface) tends to close within weeks, while the dermis (where the pigment resides) continues reorganizing for months. This gap explains why a tattoo can look “healed” relatively quickly yet still be vulnerable to irritation, friction, and UV damage well beyond the peeling stage.
The most reliable path to a clean heal is deliberately unexciting: gentle washing, light moisturizing, zero picking or scratching, and avoiding soaking until the surface has fully sealed. During the later “ghosting” period, patience is often the missing ingredient—clarity and vibrancy typically return as the new surface layer matures and becomes more transparent.
Finally, treat worsening symptoms as information, not a normal milestone. Increasing pain, expanding redness, fever, red streaking, foul odor, or yellow/green discharge are not part of routine recovery and warrant medical evaluation. Respecting the full healing timeline, and transitioning into consistent daily moisturizing and sun protection, does the most to preserve sharp lines, stable color, and long-term legibility.